Git and Github
Greetings! I'm Vishnu Vinay, a Computer Science and Engineering graduate holding a B. Tech degree. Currently immersed in the captivating world of Artificial Intelligence, I am on a quest for knowledge while pursuing a graduate certificate in Artificial Intelligence with Machine Learning. My passion lies in sharing insights and discoveries in the fields of AI, Machine Learning, Artificial General Intelligence, and Robotics through engaging blog posts. Proficient in Python, ML libraries, and algorithms, I find joy in developing and deploying ML models, with a focus on leveraging AWS Sagemaker. Join me on this exciting journey of unraveling the mysteries of AI through the lens of coding, exploration, and the ever-evolving landscape of machine learning. Let's embark on this knowledge-sharing adventure together!
It is a version control system.
Case 1 - Say you are working on a project. You add some extra code and after that the project is not working anymore. The one thing you would want to do is, go back to the previous stage. Basically, the saving the history of your project. In such cases, Git can be a really useful tool. As, it helps to save the each stage or each changes in your project. (Maintaining history of a project).
Case 2 - Say a group of developers are working on a single project remotely, and they want to share the code with each other. In this situation too, GitHub can be useful as it is a platform which allows sharing code with each other. (Sharing of code).
All the changes made to project with the details on who made the change and when did the change happen are stored in a folder called git repositories.
Note: All the commands are written in Windows terminal.
git init - Initializes a empty git repository in the project folder. It is hidden.

To see the hidden run this command.
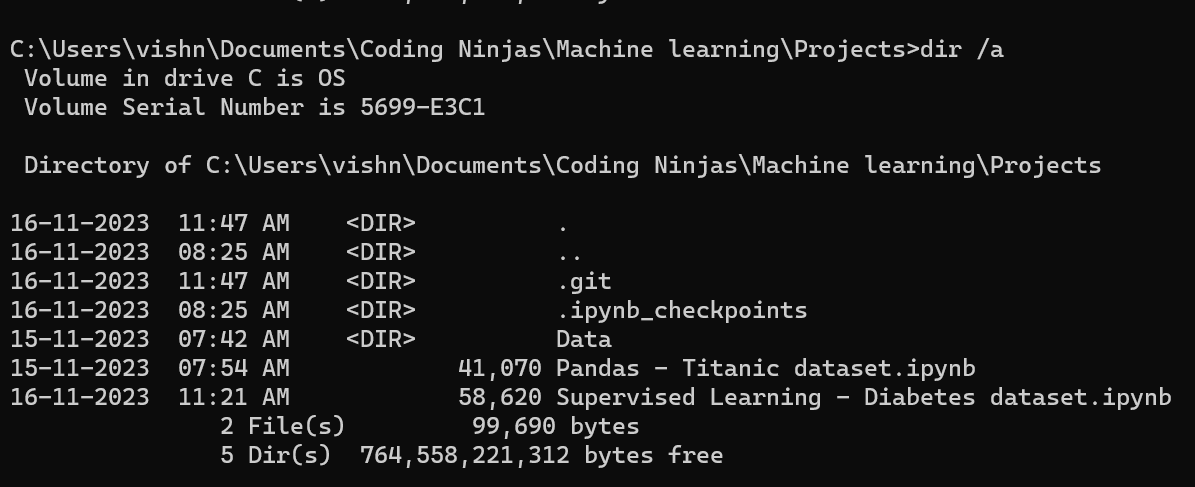
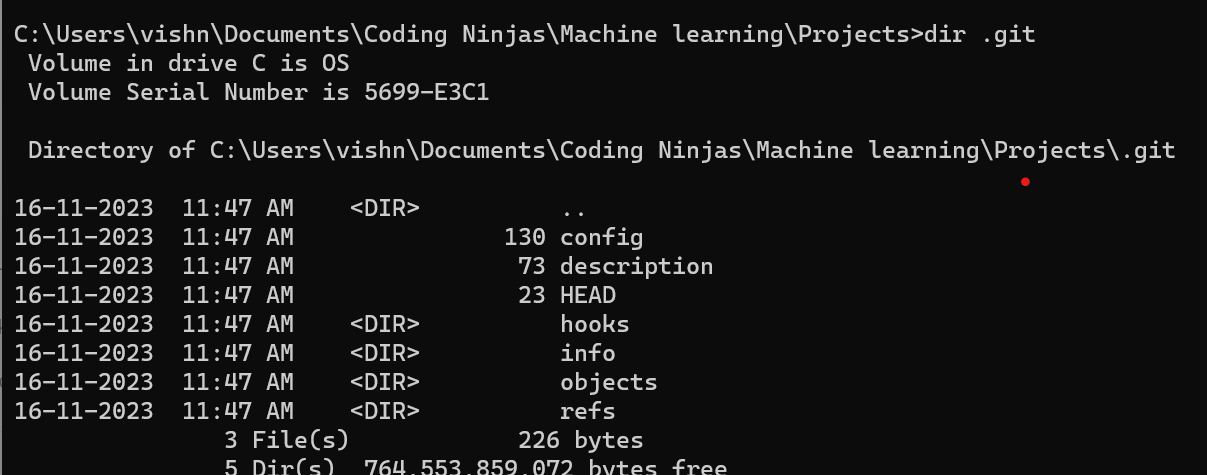
Inside the .git folder.
git status - to check the history of a file or folder.
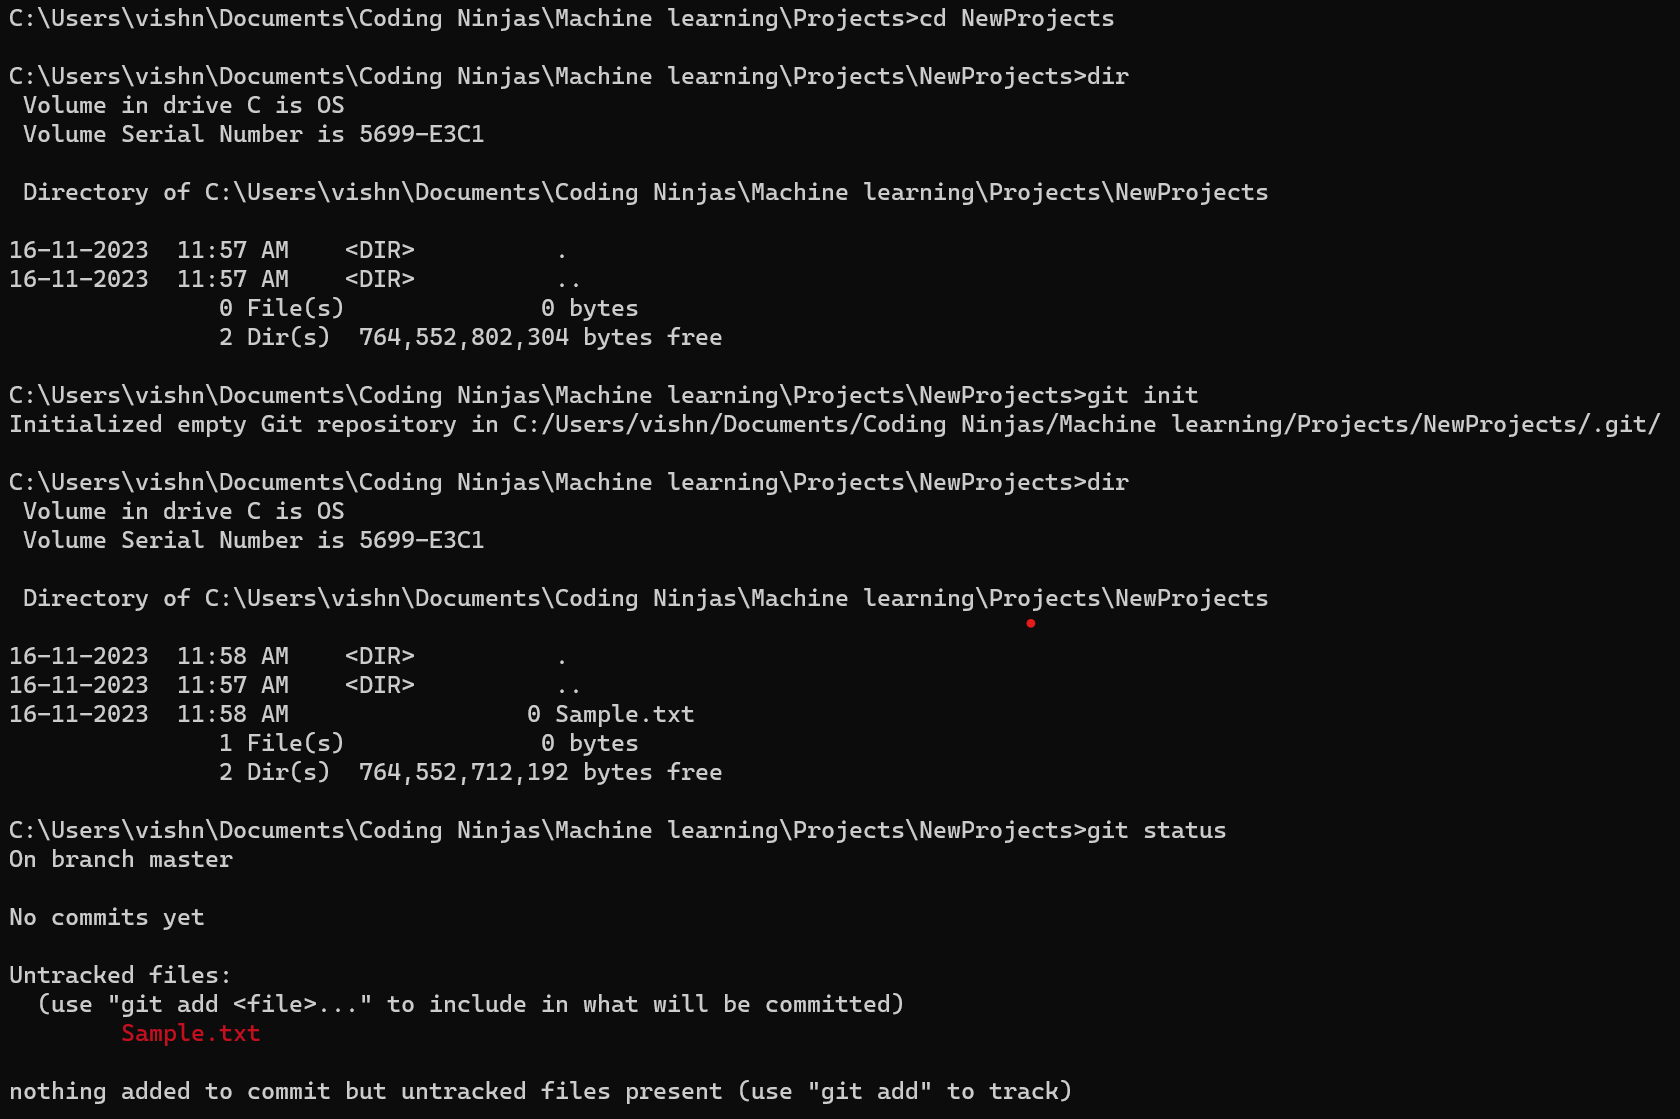
Here, created a new folder 'NewProjects'. Add a file named 'Sample.txt' manually. Now checking the status of the file using the git status command.
As you can see, it is showing the file to be untracked.
git add filename - To start tracking a particular file.
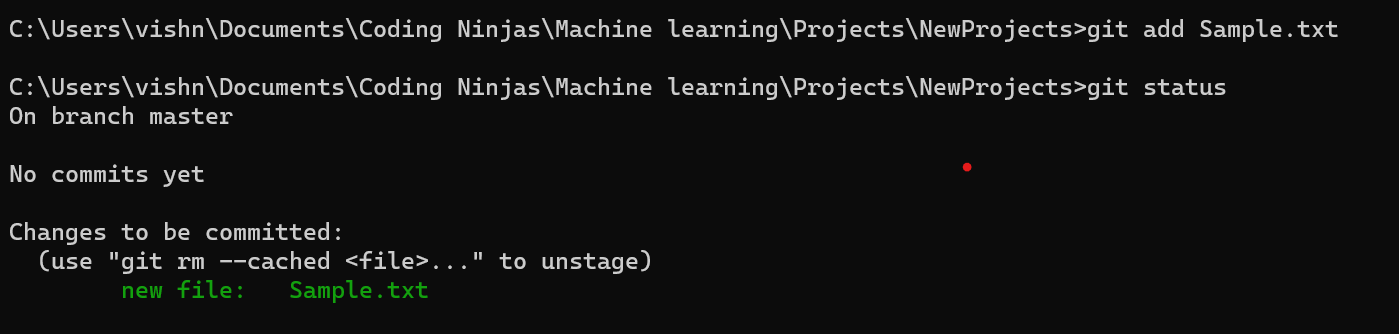
You can also, use, git add . In this command, the dot (.) represents adding all the files into tracking mode.
Also, as you can see, now file is in green color, earlier it was red color. Thus, red means untracked, while green means tracked.
git commit -m "your message" - Now to see the changes made to the file, and details on the change.
The "your message" provides the detail on the change you made.
Before running this command, make sure to run these commands:-
git config --global user.email "you@example.com" // Your git hub account
git config --global user.name "Your Name" // Your name, the person who made the change
Running the git status again, we can see this:-

Now, I have made some changes in the "Sample.txt" file. Add a a line Hello World in the file by opening it in the notepad.
After that when you run the git status, you can see.

Now, let's save this change.

git restore --staged filename - Removing the particular change, like deleting it from the history itself without committing.
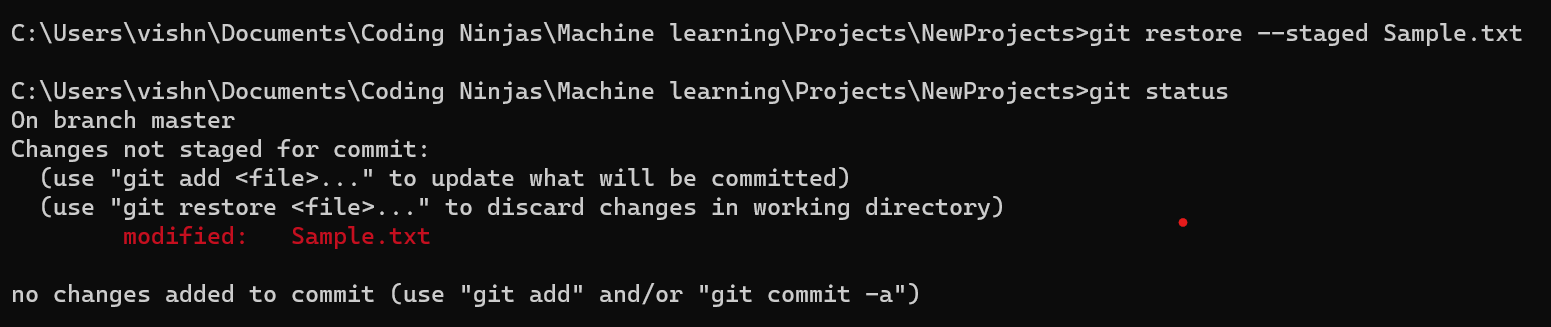
Now adding changes again

As you can see, it shows 1 insertion. As we only added a Hello World line inside the file.
git log - To see all the changes made to the file. It shows the details who made the changes with their name and email it, when the change was made with the date and time.
Try deleting the file, using the following commands.

Now run the git log and see the changes.
git reset commit-id - Goes to the previous stage based on the changes that were saved.
The commit id, can be accessed by typing the git log, in this we can see commit then the commit id associated with it.

Now try typing git log, and see the changes.
Typing git status, will show that all the previous are now in untracked stage.
git git stash - Suppose, you adding some changes but neither you want to add them to existing changes or lose the changes which you did.
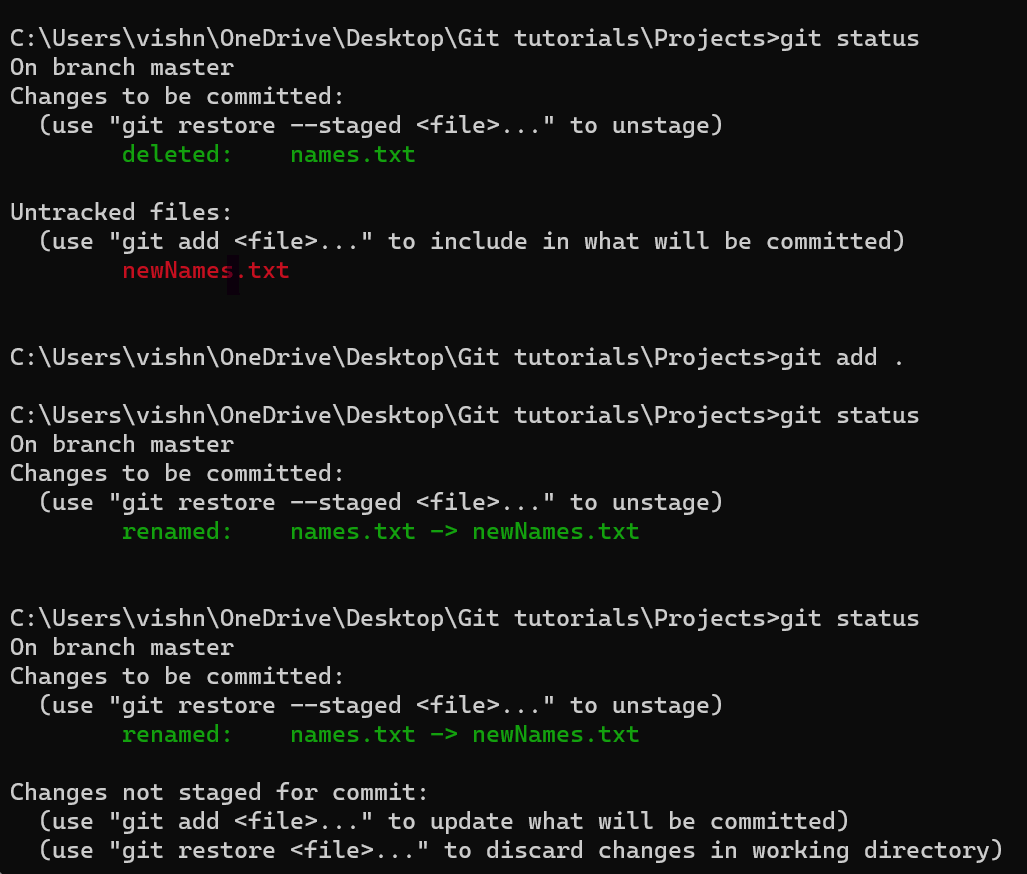
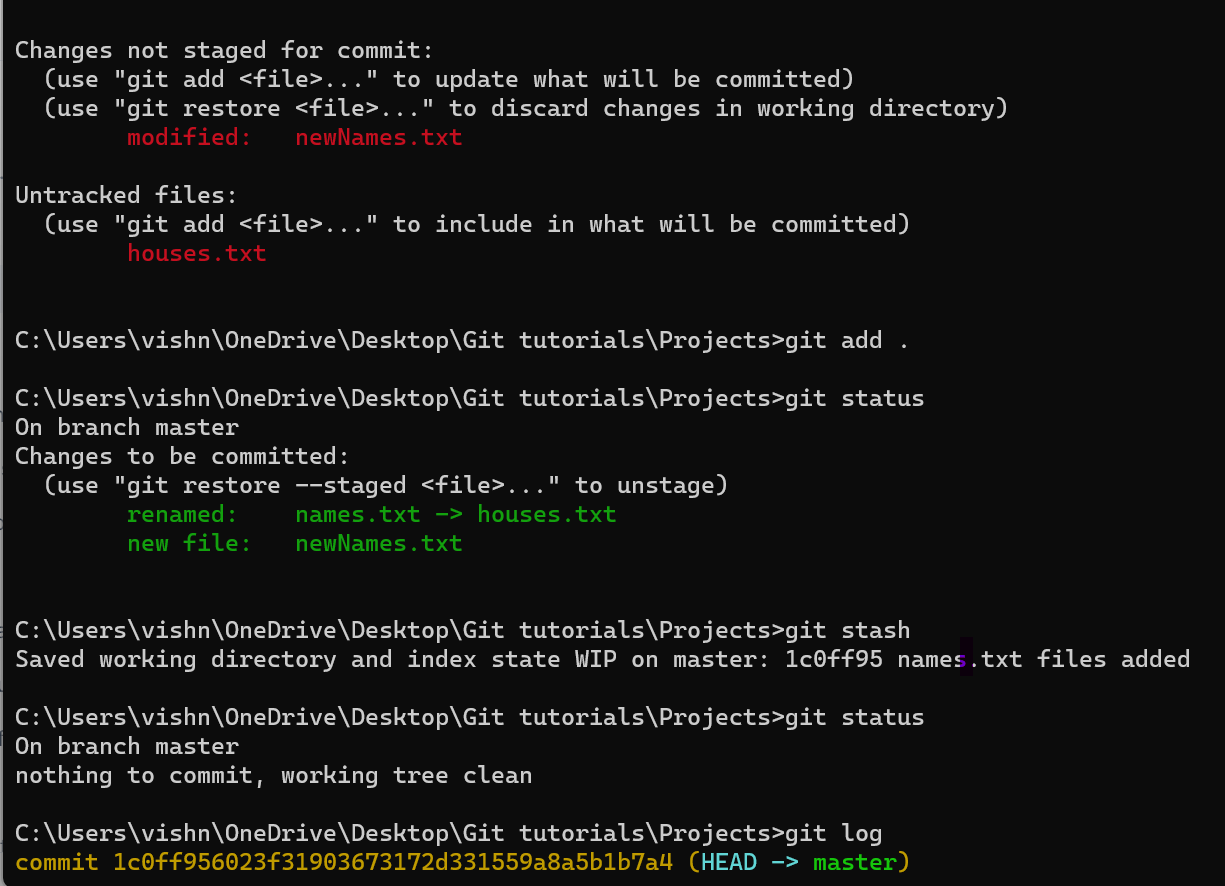
In this scenario, I deleted the "names.txt" file.
Created a new file "newNames.txt" file.
Again created a new file "houses.txt" file.
Now, I haven't committed any changes i.e., creating of the files. However, in case if my need them in future I stored that history using the git stash command. Thus, when I check the status of the file, it's still in the first commit. Try it yourself by typing git log command.
git stash pop - Now in order to save the history to the main part, I mean the one which we earlier saved for future, we can get it back using this command.
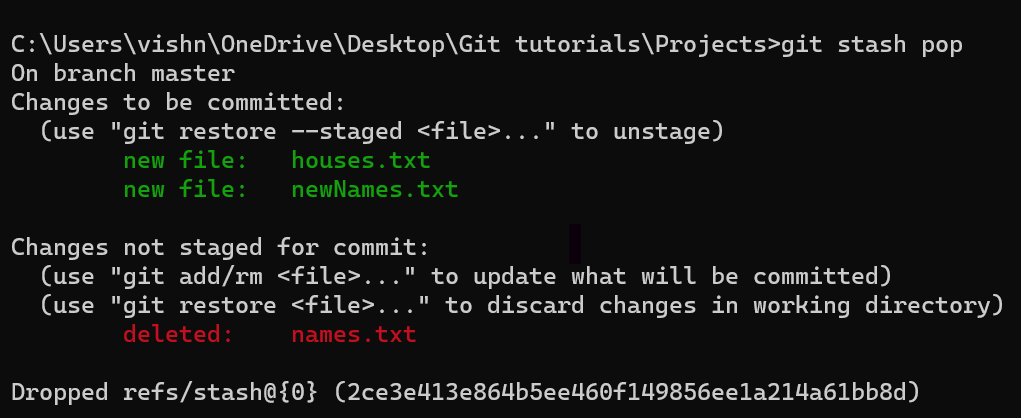
git stash clear - Deleting the above changes, it will completely gone now by using this command.

You can also, verify it by git log command.
git remote add origin repository_url - Connecting to GitHub (local computer to git hub server).
origin - url of own project from own account.
Before running this command, make sure do these.
Login to git hub with your account details
Create a new repository
Copy the repository url, replace it with the repository_url in the command.

git remote -v - Show all the urls attached to the repository.

git push origin branch_name - To add the files into a particular branch.
To forcefully, pushing a change, git push origin branch_name -f.
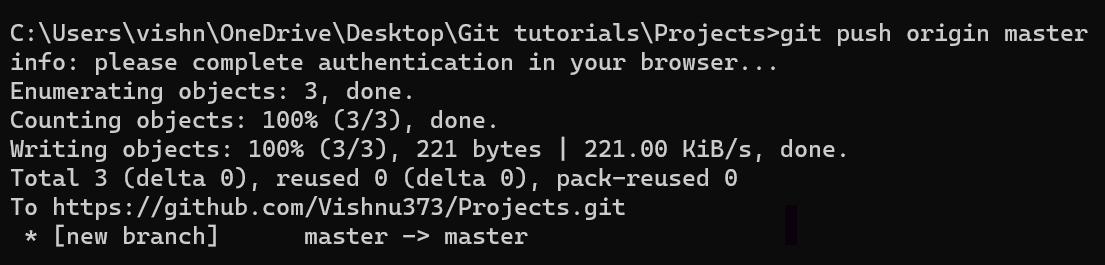
For the time being, we have added the file into the master branch.
git branch branch_name - Adding a new branch to the repository.
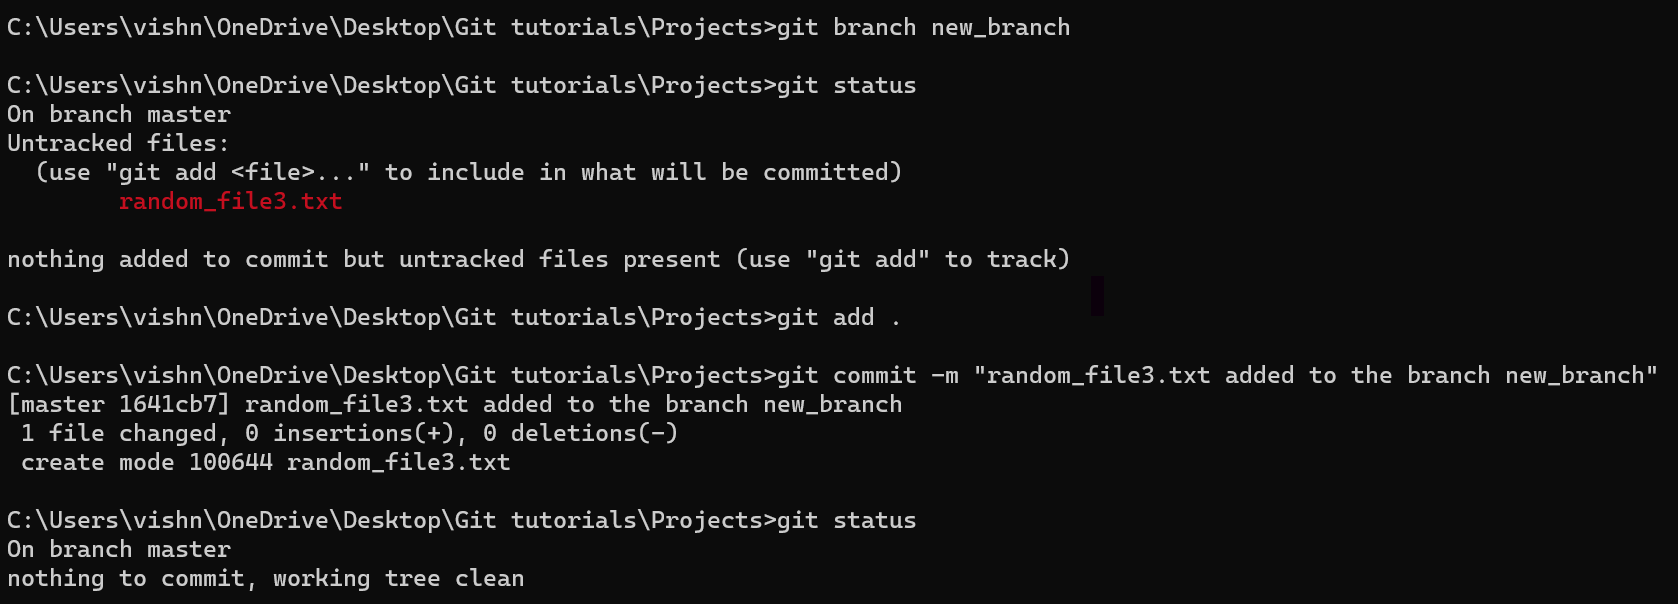
Just created a new file "random_file.txt", added it to the "new_branch" branch.
git checkout branch_name - Switching between branches.

git merge branch_name - Adding the branch to the master branch, basically making the changes visible to everyone who is working on a project.
Created a new branch "new_branch00", switched to it.
Added a "random_file4.txt".
Committed the changes.
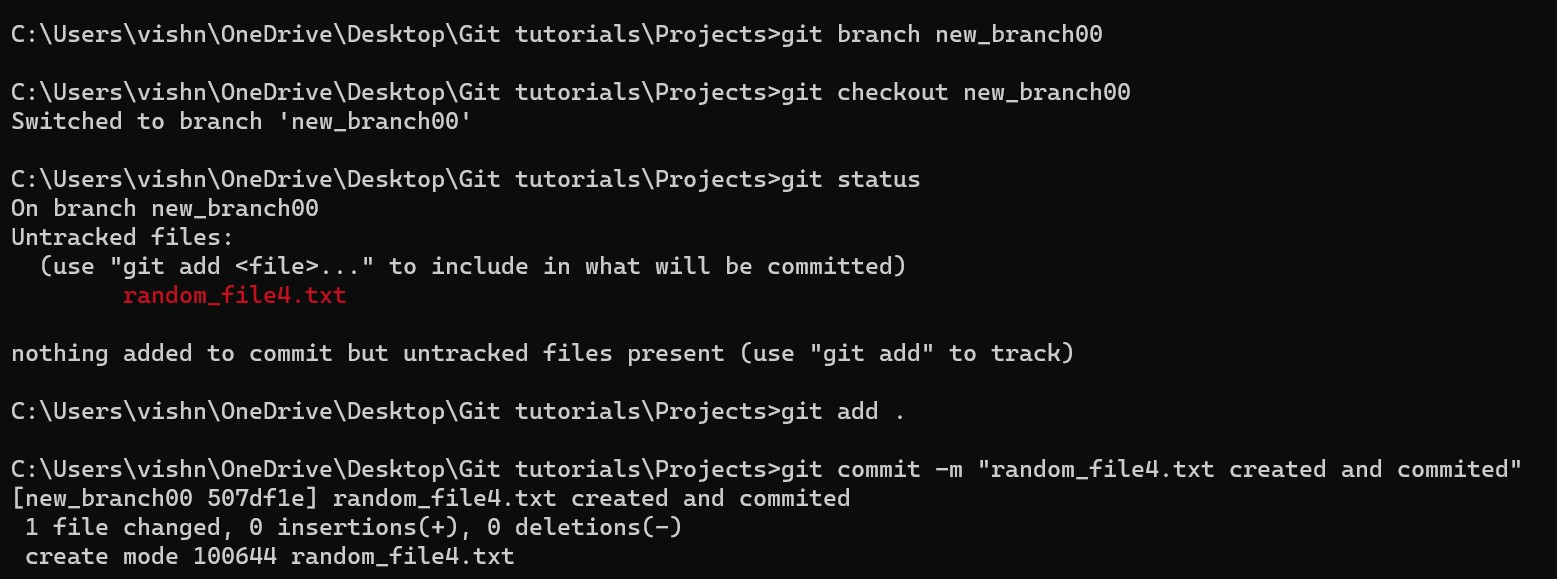
Added the file to the "new_branch00".
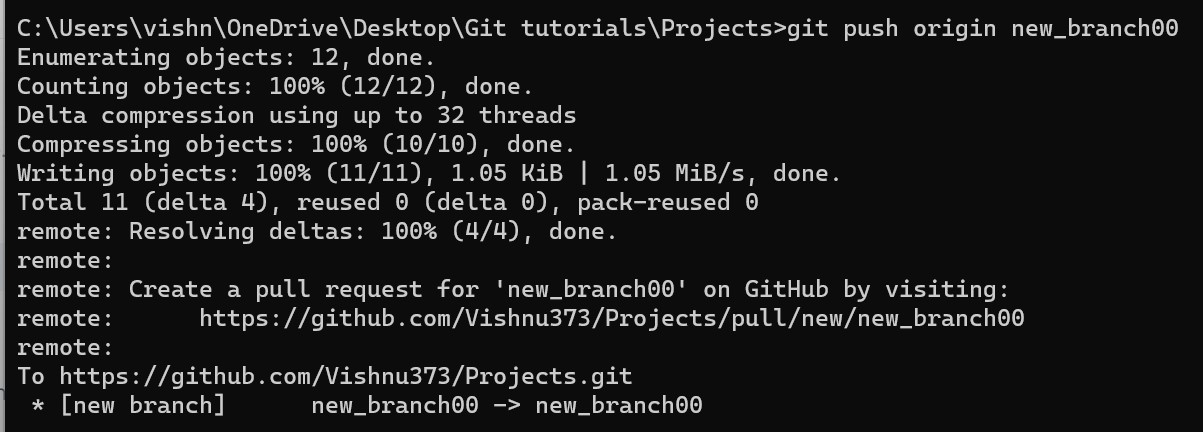
Switched to "master" branch.
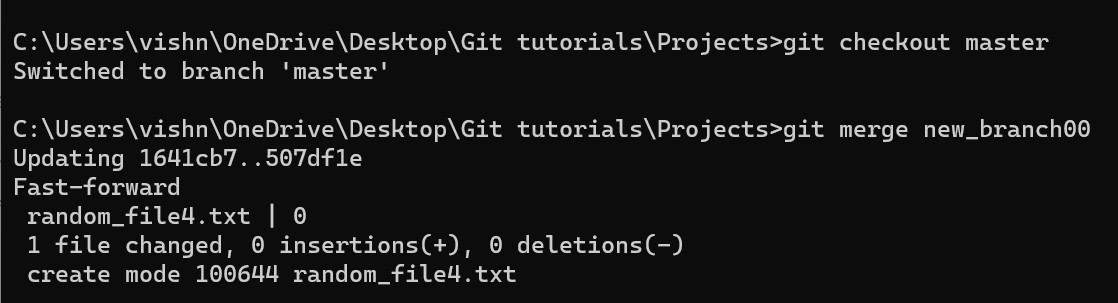
Combined the branches, thus adding the "new_branch00" results to git hub.
Finally, pushing all the changes to "master" branch.

Login to git hub account and see the changes, after running these codes.
git clone url - Basically downloading a project from the github to your local computer.

git remote add upstream project_url - Upstream is the url of the project from where you forked/copied the project.

git fetch --all --prune - To get all the commits, including the one that were deleted (prune).
git pull upstream main - Combination of git fetch --all --prune and git merge main commands.
git rebase -i hash_id_of_the_commit - Squashing all the commits into a single commit.
You either squash (s) or pick separately (pick) a commit.


Then add a commit message.
Type ":q!" to exit out of it.
Also, type git log to see the changes i.e., the commits being merged.
Branches: Branch is similar to the real life branch which we see in a tree.
Try randomly adding some files and contents inside the files. Then, commit them.
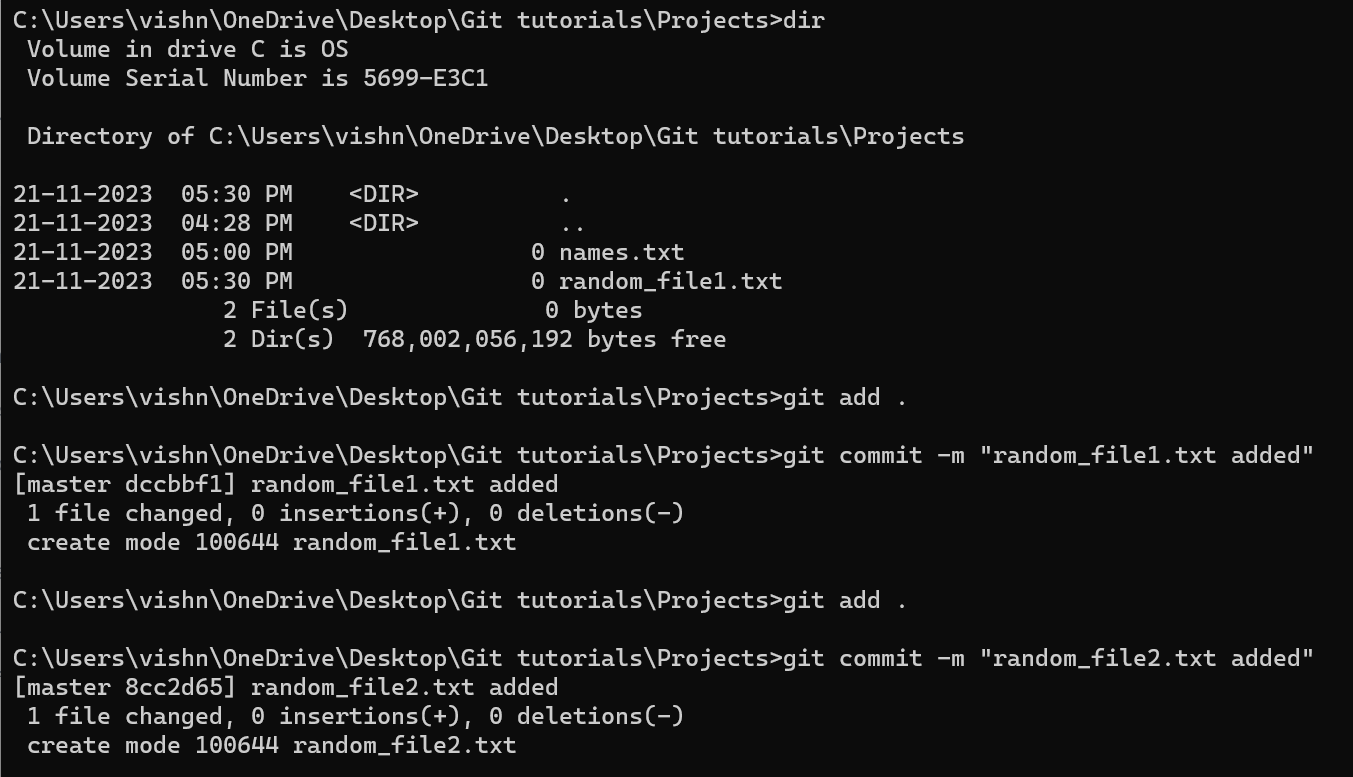
After this, run git log command and you will see a master branch for the very first commit you made and for the rest of the commits there is nothing.
The structure is kind of like this:
master -> commit_1 -> commit_2 -> commit_3 ->.... commit_n
The idea is to save each changes as separate which you make in the project. Thus, if the code crashes or any other problem occurs or you want to go back, you don't have keep editing in the current code base.
Eg:- Say you are creating a food delivery app.
Master branch - Page 1 -> the login details.
Commit 1 - Page 2 -> Select the restaurant where you want order from.
Commit 2 - Page 3 -> Delivery address selection.
Commit 3 - Page 4 -> Payment page
Commit 4 - Page 5 -> Confirmation page
Assume that, the app crashes in the payment page. So, instead of tampering in the confirmation page, all you need to do it go to commit 3 and do the necessary changes and then attach the commit 4.
HEAD: Inside, the .git folder, there is "HEAD", which basically is like a pointer to indicate that currently which branch is in control i.e., if you make any changes, which branch will have the new changes or which branch will contain the new commits.
Try running git log command, to see where the HEAD is pointing in each scenarios:-
Before creating the "new_branch". You can see that in this case, The HEAD is master.
After creating the "new_branch". You can see that in this case, The HEAD is "new_branch".
Fork: Making copy of an existing project in the git hub.
Say you are trying to add some changes to someone else project named "FoodDeliveryProject" present in another account person's account named "Abbas".
You cannot directly make changes in it, instead you fork it. Basically, creating a copy of the "FoodDeliveryProject" project in your own account. Then you can do whatever you want.
Merge conflicts: Making same changes by two or more different persons in a project.
Consider the same example of food delivery app.
Say two developers dev1 and dev2 created 'confirmation page' and then send their commits to the git hub. The git will get confused since both of them worked on the same page.
Thus, in order to resolve this, we need to manually check which pull request we need to accept whether it be dev1 or dev2. And then adding it to master branch.